I recently rolled out the SSL VPN feature on my WatchGuard M200 Firebox. This will replace the SBS 2008 PPTP VPN for Mobile Users. PPTP is no longer regarded as secure.
The SSL VPN itself works fine, but the SSL Certificate is “self generated” by the Firebox, so users receive a security warning when they connect.
Since my SBS 2008 has an SSL Certificate installed (purchased from GoDaddy), I wondered about re-using this on the Firebox.
My first thought was to visit the GoDaddy web site and download the existing SSL Certificate. However, I soon realised that the Certificate was “tied” to the SBS, and therefore I would not be able to load it into the Firebox “as is”.
The reason for this is that the original Certificate Request was generated on the SBS, and in addition to the Certificate itself, there is also a “matching” Private Key (which stays on the SBS).
In order to load the SSL Certificate onto another host, you need BOTH the Certificate AND the Private Key.
The procedure for doing this is fairly simple:
From the SBS 2008 Console, load up a “Certificates” Snap-In for the “Local Machine”.
–

–

–

–
Identify the GoDaddy SSL Certificate, and then choose “Export” from the context menu.
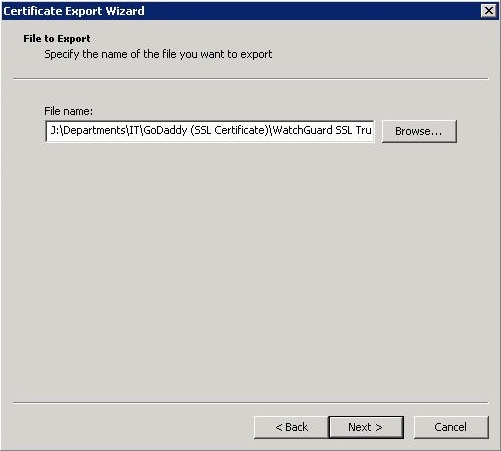
My certificate is for “remote.mydomainname.co.uk“. This points to the Public WAN Interface of my Network.
Note: This process DOES NOT remove the Certificate from the SBS. We are merely “making a copy” to allow us to upload the Certificate to another host.
–

–
Work through the Export Wizard, and be sure to export the “Private Key” in addition to the Certificate itself.
–

–

–

–
–
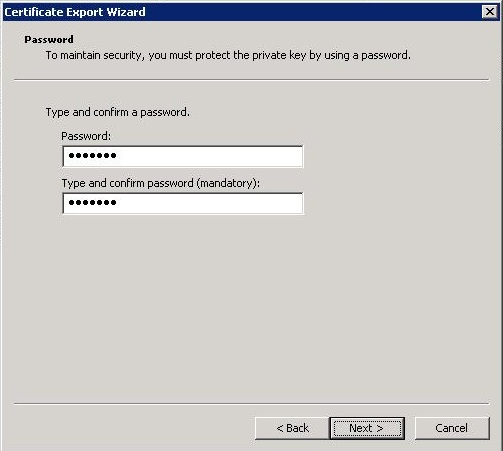
Generate a password and make a note of it (you will need it in the next step)!
–
–
–

–
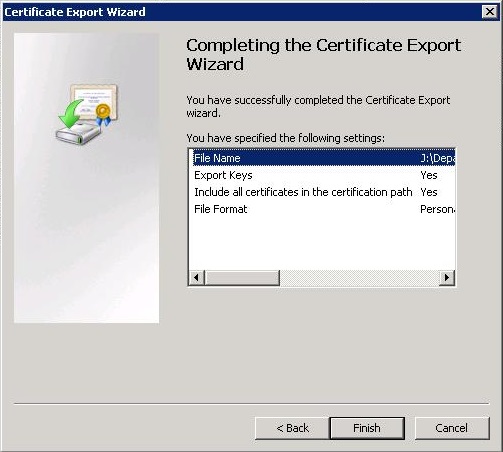
We now have a “.pfx” file containing both the “Certificate” and matching “Private Key”.
The next step will be performed using the WatchGuard Console.
I recommend you make a backup image of the Firebox before continuing!
Choose “Certificates” from within the System Menu, and then “Import Certificate”.
–

–
–
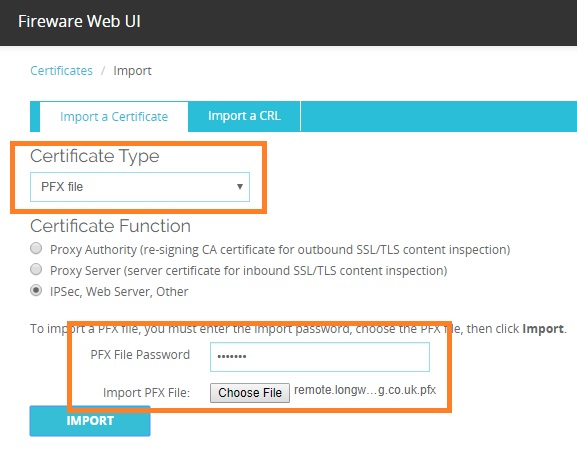
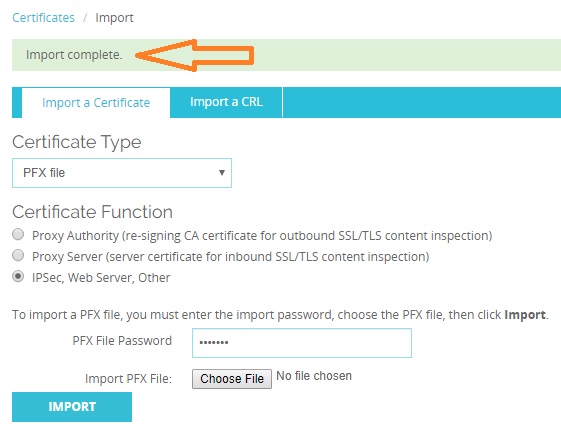
Set the Certificate Type to “PFX”, and choose the “pfx” file you created in the previous step. The password is the one you created above.
Click “Import” when are ready to continue.
–
–
You should receive a confirmation that the certificate has been successfully imported.
–
The final step is to link the SSL Certificate to the Firebox Web Interface.
–

–
If you wish to test the certificate, you can do that here: https://www.ssllabs.com/ssltest/analyze.html
That’s It.
I hope you found this post useful.
–
–

Leave a comment